It has recently become possible to run CiviCRM as a standalone site, rather than as a plugin inside a CMS like Drupal or WordPress. This is great news (I’ve wanted this for a long time) and it works really well for a clean installation but migrating an existing site remains difficult, which will limit adoption. There is a “Standalone Migrate” extension that sometimes helps but the instructions didn’t work for me, it’s not always applicable and I couldn’t find any other documentation for this process. Nevertheless I did eventually achieve a migration on several sites (with or without the plugin), so here’s what worked and didn’t work in case it helps others.
I’ve tested this with CiviCRM version 6.6.3 running on Ubuntu 24.04, migrating from WordPress 6.8.3.
What this achieves:
- All database contents and files are copied to a new standalone installation, preserving contacts, transaction histories, images and metadata etc.
- The new installation can be on a different server and the database can be separate from the CMS database.
- The CMS can still communicate with CiviCRM using form processors and the API.
What it does NOT achieve:
- Passwords and roles for logged-in users will not in general be transferred – they will have to be manually recreated or reset.
- Synchronisation of CMS users (e.g. in WordPress or Drupal) with CRM users in CiviCRM will no longer happen. In theory it’s possible, but I’m not aware of any off-the-shelf plugins or extensions that can do this yet.
Note that I have used the cv utility for most actions and I don’t know of any method that avoids the need for command-line access, although it may be possible in theory. The cv utility can easily be installed (or updated) with the following terminal commands.
sudo curl -LsS https://download.civicrm.org/cv/cv.phar -o /usr/local/bin/cv
sudo chmod +x /usr/local/bin/cv
cv --version
I’ve tried to use APIv4 calls rather than accessing the database directly, but that wasn’t always possible because APIv4 is incomplete.
Create a “clean” standalone site
The migration is supposed to require a “clean” target installation, but it’s not clear exactly what that means and it’s not really true – a whole bunch of files need to be copied manually and at least one new administrator created. We will be completely replacing the database contents in any case. What worked for me in the end was to first untar/unzip the latest standalone installation files from https://civicrm.org/download to an empty root folder (e.g. public_html) so that it contains folders core, ext, private, public and a few files, then I used the hosting control panel to create an empty database. The CiviCRM versions on source and target should preferably be the same.
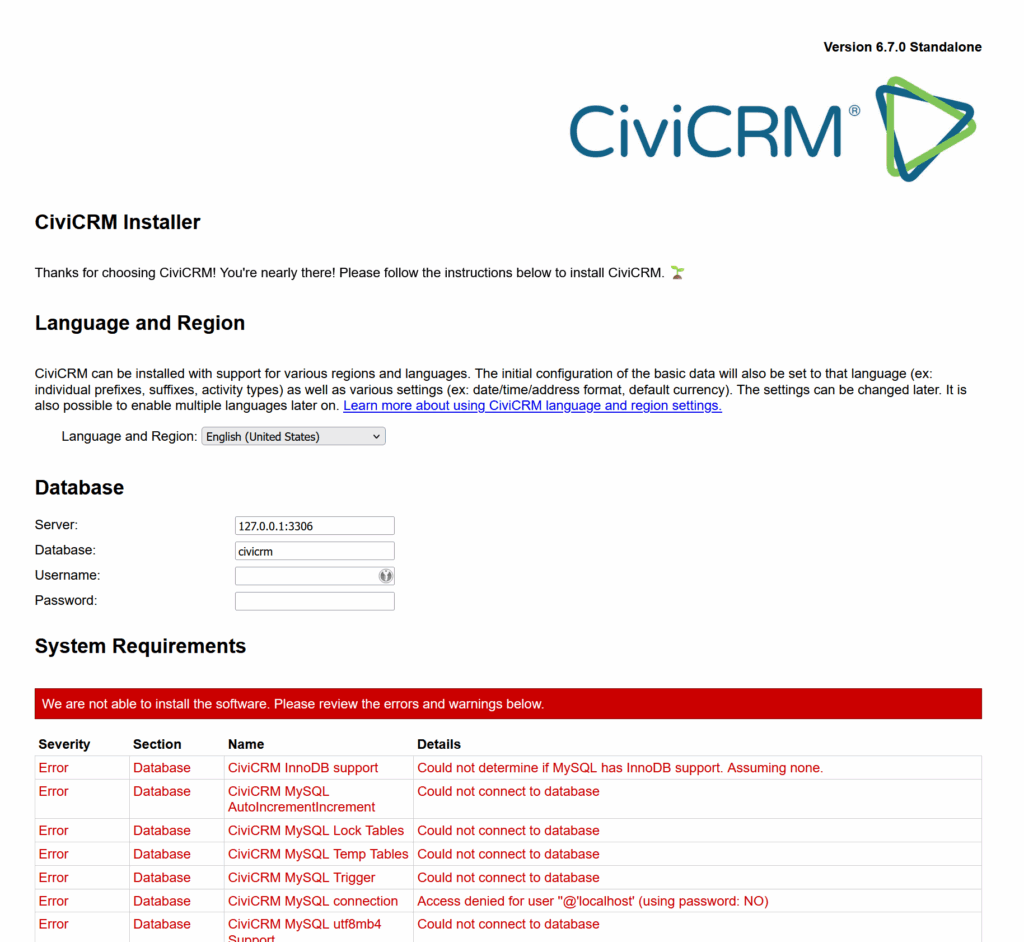
Next visit the standalone site in a browser. Our goal at this stage is just to create a configuration file and check that basic things work like the database connection, file paths, PHP versions and https connections. If the database is empty and no configuration file exists, an installer like this should appear that prompts you for the database location, name, username and password.
On the next screen you are prompted to create a temporary admin user and password, which will allow you to log in to the empty site to check it. A configuration file should be created at private/civicrm.settings.php.
Note that there is currently a bug that means some of the code (rest.php) looks for the configuration file at a different location, core/civicrm.config.php so you will need to copy it there as well, or create a symlink.
cd core
ln -s ../private/civicrm.settings.php civicrm.config.php
Note also that if you do later manage to use the Standalone Migration extension on the origin site, the user you create here can’t be the same as any of the existing users, any existing passwords will be lost anyway and the Change Password page (under the CiviCRM logo in the admin bar) is currently broken (I couldn’t get it to pass the complexity check). The solution is to use the “Forgotten password?” link on the login screen to log in as one of the administrators, which may mean you will need a new working email address for the admin user.
If you get any of this wrong you may need to empty the database, delete the configuration file and start again, perhaps also using a “Private” browser window or clearing caches and deleting cookies to recover.
Copy files
File locations for images, custom files and extensions can be found in Administer > System Settings > Directories in both the original and target systems and are configurable here or in the configuration file. The files in these folders will need to be copied manually between systems using your favourite method, such as a file manager, SSH or the command line.
- By default, extensions will need to be copied from /wp-content/uploads/civicrm/ext on the source to /ext on the target.
- Image files typically move from /wp-content/uploads/civicrm/persist/contribute to /public/media.
- Custom files typically move from /wp-content/uploads/civicrm/custom to /private/attachment.
Check file ownership and permissions carefully afterwards – moving files between sites often changes these and the resulting error messages can be confusing.
Copy database contents
If you do manage to use the Standalone Migration plugin on the origin site there’s no need to copy database contents and it preserves user accounts (but not passwords) so it’s worth a try, using a command like the following.
cv api4 StandaloneMigration.run targetSitePath=/path/to/new/standaloneIt worked for me sometimes but not reliably. (I couldn’t resolve errors like “Call to undefined function get_option()”, the API explorer didn’t work, and it’s not expected to work in all situations anyway.)
I’ll assume you will need to copy the database contents manually, using your favourite method such as a control panel, phpMyAdmin or the command line. The original standalone database will be overwritten, user accounts will be lost (but contacts will be preserved) and you won’t be able to log in, so the next task will be to create a new user with administrator privileges.
Make sure the database is upgraded, the “standaloneusers” extension is enabled and caches are flushed using the following commands.
cv upgrade:db
cv en standaloneusers
cv flush
If you now visit the target standalone site in a browser, you should see the login screen. If you see a server error instead, check file ownership and permissions and the existence and contents of the configuration file at private/civicrm.settings.php.
Note that it’s unfortunately normal to see many PHP deprecation warnings from old extensions when you run cv commands, which can make it difficult to see the results.
Delete unwanted roles and users
(Optional) If we’re not using the standalone migration plugin (and even if we are) old users and roles are not much use to us. We can delete them to avoid clashes with our newly created ones, and also to get the database back to a known state. Of course, we keep all existing contacts, it’s only users with passwords that need to be removed or recreated.
# Delete all user-role assignments
echo "DELETE FROM civicrm_user_role;" | cv sql

# Delete all users (civicrm_uf_match entries)
echo "DELETE FROM civicrm_uf_match;" | cv sql

# Delete all roles
echo "DELETE FROM civicrm_role;" | cv sql

cv flush
Authentication
We need to manually configure AuthX for API and web authentication, because they’re not enabled by default and we’re not using the installer or the migration plugin.
cv api4 Setting.set values='{"authx_login_cred":["jwt","api_key","pass"]}'
cv api4 Setting.set values='{"authx_guards":["site_key","perm","user"]}'
Role system
Migration doesn’t preserve the role system, so we need to generate some roles. The following commands will generate roles “Everyone”, “Staff” and “Administrator”, similar to the ones generated by the standalone installer.
You will probably also need a special role for the cron system to use for scheduled jobs – I changed from using the “wp-cli” method to the “cv” method after this migration. If you use the Form Processor extension (which is now the recommended way of connecting a website to standalone CiviCRM) you will also need a role for that.
Note that the permission “access CiviCRM” has changed its meaning in the standalone installation and the name doesn’t match the name in the web interface.
Here are commands to create all those roles.
Updated 2025-10-27 to add permissions that might be needed in future for components that are currently disabled, and to remove some unnecessary permissions.
# Create everyone role
cv api4 Role.create +v name="everyone" +v label="Everyone, including anonymous users" +v permissions='["access CiviMail subscribe/unsubscribe pages","view public CiviMail content","make online contributions","view event info","register for events","access password resets","authenticate with password"]' +v is_active=1

# Create staff role
cv api4 Role.create +v name="staff" +v label="Staff" +v permissions='["access CiviCRM","access Contact Dashboard","access uploaded files","add contacts","edit all contacts","delete contacts","import contacts","access deleted contacts","merge duplicate contacts","edit groups","manage tags","administer Tagsets","view all activities","delete activities","add contact notes","view all notes","access CiviContribute","delete in CiviContribute","edit contributions","make online contributions","view my invoices","access CiviEvent","delete in CiviEvent","edit all events","edit event participants","register for events","view event info","view event participants","gotv campaign contacts","interview campaign contacts","manage campaign","release campaign contacts","reserve campaign contacts","sign CiviCRM Petition","delete in CiviGrant","edit grants","access CiviMail","access CiviMail subscribe/unsubscribe pages","delete in CiviMail","access CiviMember","delete in CiviMember","edit memberships","access all cases and activities","access my cases and activities","add cases","delete in CiviCase","delete in CiviPledge","edit pledges","access CiviReport","access Report Criteria","save Report Criteria","profile create","profile edit","profile listings","profile listings and forms","profile view","close all manual batches","create manual batch","delete all manual batches","edit all manual batches","export all manual batches","reopen all manual batches","view all manual batches","access all custom data","access contact reference fields"]' +v is_active=1

# Create admin role
cv api4 Role.create +v name="admin" +v label="Administrator" +v permissions='["all CiviCRM permissions and ACLs"]' +v is_active=1

# Create cron_user role
cv api4 Role.create +v name="cron_user" +v label="Cron User" +v permissions='["access CiviCRM","view all contacts","access CiviMail","access CiviReport","access CiviEvent","access CiviContribute","access CiviMember"]' +v is_active=1

# Create form_processor role
cv api4 Role.create +v name="form_processor" +v label="Form Processor" +v permissions='["access CiviCRM","add contacts","edit all contacts","access CiviContribute","edit contributions","access CiviEvent","edit event participants","access CiviMember","edit memberships","access CiviMail"]' +v is_active=1
Admin user
The administrator user needs to be associated with a contact, so we create that first. An email address is needed to reset the password using the “Forgotten password?” link. Add it where it says INSERT_ADMIN_EMAIL_HERE.
# Find contact by email (or create if doesn't exist)
ADMIN_EMAIL="INSERT_ADMIN_EMAIL_HERE"

ADMIN_CONTACT_ID=$(cv api4 Email.get +w email="$ADMIN_EMAIL" +s contact_id --out=json 2>/dev/null | grep -o '"contact_id":[0-9]*' | head -1 | cut -d: -f2)

if [ -z "$ADMIN_CONTACT_ID" ]; then
  cv api4 Contact.create +v contact_type="Individual" +v first_name="Admin" +v last_name="User" +v display_name="Admin User"
  ADMIN_CONTACT_ID=$(cv api4 Contact.get +w display_name="Admin User" +s id --out=json | grep -o '"id":[0-9]*' | head -1 | cut -d: -f2)
  cv api4 Email.create +v contact_id=$ADMIN_CONTACT_ID +v email="$ADMIN_EMAIL" +v is_primary=1
fi

cv api4 User.create +v username="admin" +v contact_id=$ADMIN_CONTACT_ID

USER_ID=$(echo "SELECT id FROM civicrm_uf_match WHERE contact_id = $ADMIN_CONTACT_ID;" | cv sql | tail -n 1)
ADMIN_ROLE_ID=$(cv api4 Role.get +w name="admin" --out=json | grep -o '"id":[0-9]*' | head -1 | cut -d: -f2)

echo "INSERT INTO civicrm_user_role (user_id, role_id) VALUES ($USER_ID, $ADMIN_ROLE_ID);" | cv sql

cv flush
You should now be able to use the “Forgotten password?” link on the login page to set the password for the admin user. Remaining steps can therefore be completed using the administration dashboard if you prefer.
Cron user
To run scheduled jobs automatically using a cron job you will need to use one of the methods described here. We already created a “cron_user” role with appropriate permissions for this purpose above.
cv api4 Contact.create +v contact_type="Individual" +v first_name="Cron" +v last_name="User" +v display_name="Cron User"

CRON_CONTACT_ID=$(cv api4 Contact.get +w display_name="Cron User" +s id --out=json | grep -o '"id":[0-9]*' | head -1 | cut -d: -f2)

cv api4 User.create +v username="cron_user" +v contact_id=$CRON_CONTACT_ID

USER_ID=$(echo "SELECT id FROM civicrm_uf_match WHERE contact_id = $CRON_CONTACT_ID;" | cv sql | tail -n 1)
CRON_ROLE_ID=$(cv api4 Role.get +w name="cron_user" --out=json | grep -o '"id":[0-9]*' | head -1 | cut -d: -f2)

echo "INSERT INTO civicrm_user_role (user_id, role_id) VALUES ($USER_ID, $CRON_ROLE_ID);" | cv sql

cv flush
Form processor user
(Optional) If you are going to process forms that are hosted elsewhere (e.g. using Contact Form 7 in WordPress), add a form processor contact. Create a form processor user and connect them to the contact and the role.
cv api4 Contact.create +v contact_type="Individual" +v first_name="Form" +v last_name="Processor" +v display_name="Form Processor"

FORM_CONTACT_ID=$(cv api4 Contact.get +w display_name="Form Processor" +s id --out=json | grep -o '"id":[0-9]*' | head -1 | cut -d: -f2)

cv api4 User.create +v username="form_processor" +v contact_id=$FORM_CONTACT_ID

USER_ID=$(echo "SELECT id FROM civicrm_uf_match WHERE contact_id = $FORM_CONTACT_ID;" | cv sql | tail -n 1)
FORM_ROLE_ID=$(cv api4 Role.get +w name="form_processor" --out=json | grep -o '"id":[0-9]*' | head -1 | cut -d: -f2)

echo "INSERT INTO civicrm_user_role (user_id, role_id) VALUES ($USER_ID, $FORM_ROLE_ID);" | cv sql

cv flush
The Form Processor needs an API key, which we can easily generate by installing the API Keys extension.
cv ext:enable apikeyFind the “Form Processor” contact in the web interface and generate an API key there, then copy this key and the Site Key (which is also shown on the API Key tab) to the site where the form is hosted. If you are using the Contact Form 7 CiviCRM integration plugin in WordPress, the path to use is core/extern/rest.php. Note that this is a very old plugin and the “Validation failed” warning is incorrect – “administer CiviCRM” permission is NOT required. Also note my comment above about the configuration file being in the wrong place and the need to create a copy or a symlink for this to work.

It’s possible to generate forms in CiviCRM but a big advantage of having them on the host website is you can use a plugin such as CleanTalk to block spam. (There is a “reCAPTCHA” extension for CiviCRM but it doesn’t work well in my experience.) Also the styling can be consistent with the host site.
Replace hardcoded URLs and paths
The Mosaico extension in particular uses hardcoded URLs and paths in the database that will need to be adjusted. To recover missing images and templates after a migration you can install the Mosaico Migration extension.
cd ext
cv dl com.skvare.mosaicomigration@https://github.com/Skvare/com.skvare.mosaicomigration/archive/master.zip
cv en mosaicomigration
Go to Administer > System Settings > Mosaico Migration to make the changes.
Fix outbound email
Update 2025-10-27: I subsequently hit a problem with outbound emails not going out that is described and fixed here. Even though the “Test Email” function appeared to work (which is arguably a bug in itself) and mailings appeared to start successfully (ditto), no mailing messages were going out. You may need to delete the value of mailing_backend in table civicrm_settings in the database and recreate the outbound email settings at Administer > System Settings > Outbound Email after a site migration.